Tuesday, 24 December 2013

ALL I WANT FOR CHRISTMAS IS TRIFLE


Merry Christmas gelato lovers!
I’d firstly like to apologise to you, dear reader, for my long unexplained absence. But I've returned!

Since my last post I've been holidaying in India - lurking around the buffets of engagement parties, shopping up a storm in the market places of Delhi, being amazed at the Taj Mahal's beauty and discovering the delightful sweets that India has to offer. More on that in one of my next posts, so stay tuned!


I also blame my lengthy absence on that extremely addictive app called Candy Crush - you know that one everyone invited you to on Facebook ages ago. You just know you're addicted to this app when you have the theme song stuck in your head all day and you start having visions of candy formations over a person's face mid-way through a conversation.


I did plan on making a Christmas-themed gelato, but I was so lazy and naughty and bought a cheap-as-cheap 4L tub of vanilla, so there hasn’t been room in the freezer. I promise I’ll make something for next year’s Christmas.


This Christmas is the first where all my family are overseas and the first one I've spent with my partner, which means it’s time to make new traditions. His Christmas ritual is watching the movie Bad Santa, which I’ve been forced to join in on. And mine is making (and of course, devouring) a trifle for dessert. So our day is sorted! 


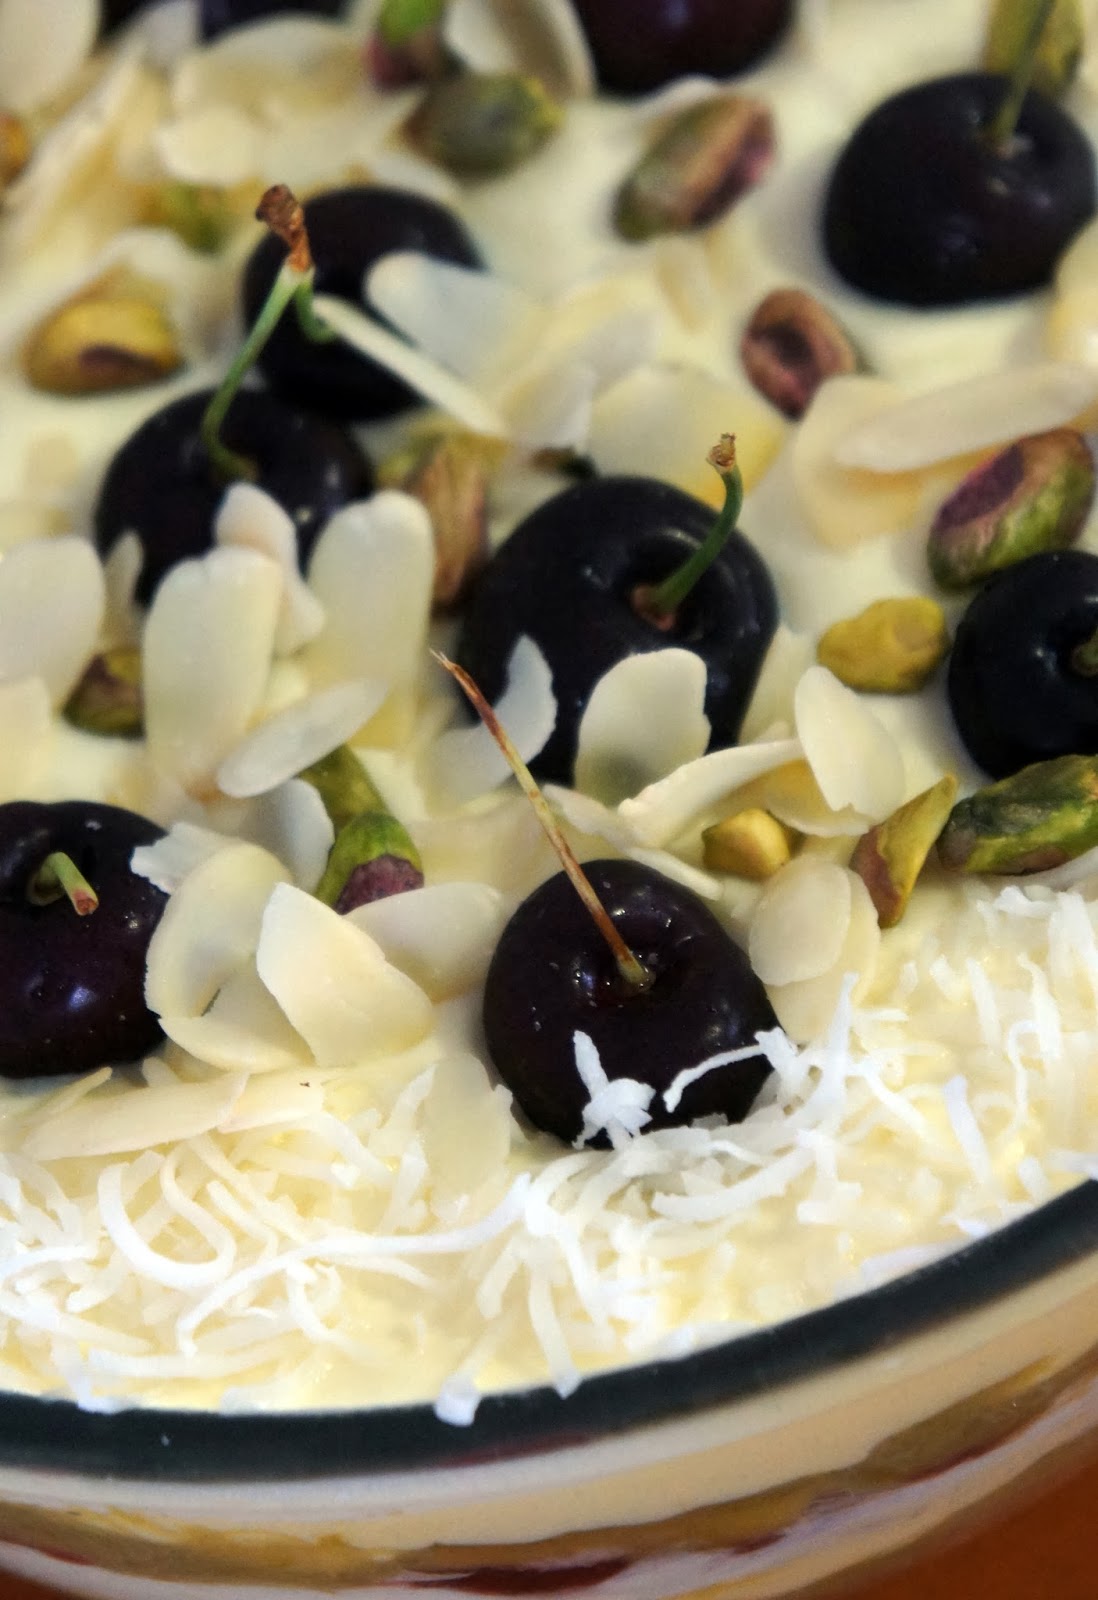
RHUBARB & CHAMBORD TRIFLE

Makes about 1 Large Bowl


Ingredients:

Custard
  • 3 Tbsp. custard powder
  • 1-2 Tbsp. sugar
  • 500mL milk 
Whipped Cream
  • 600mL thickened cream
  • 1-2 Tbsp. sugar
  • 1 tsp vanilla essence 
Others ingredients
  • Fruit - I used a bunch of (home-grown!) rhubarb, cooked in 1/2 cup water and add sugar to taste
  • Jam - I used raspberry
  • Old sponge cake or pannetone or sponge fingers
  • Fruits and nuts for decorations - I used cherries, coconut, pistachios and flaked almonds
  • Optional: Liqueur - traditionally sherry, but I used Chambord Blackberry liqueur


Method:
  • Cut the sponge cake into triangles and spreak jam on the top and sides.
  • Layer the bottom of the bowl with the jam-covered sponge
  • Drizzle the liqueur onto the sponge.
  • Make the custard:
    • Put the custard powder & sugar in a saucepan and add a few dashes of milk and whisk.
    • Once combined without lumps, add the milk gradually.
    • Heat until boiling and then reduce heat and simmer for a minute.
    • If you need to thicken the custard, add more powder in a jar or bowl and add a dash of milk and mix together, then gradually add to main mixture.
  • Layer the trifle with rhubarb/fruit, custard, then whipped cream and repeat.
  • Decorate the top with fruit, nuts, shaved chocolate, whatever takes your fancy.
  • Then INDULGE because it's Christmas!


Merry Christmas to you!

Lots of love,
the Gelatosmith
 xoxo


Wednesday, 30 October 2013

EYEBALL SUNDAE Black Sesame Gelato with Tapioca Pearls


Happy Halloween!

It's not a huge holiday here in Australia, but I couldn't resist the thought of a Halloween Gelato! I've been wanting to make a Black Sesame flavour for ages. My family eats it quite often at my Uncles restaurant at the end of an enormous Chinese Banquet.

This is my Eyeball Sundae, with roasted Black Sesame Gelato served with Tapioca Pearls and Eyeball Bubblegum. To make the Tapioca Pearls, soak 1/2 cup in 5 cups of boiling hot water and heat on stove (on medium) for about 5 minutes, until the pearls are soft and plump. Then remove from heat. I wouldn't mix in the pearls into the gelato, as they will go hard after awhile. You'll have to reheat them to re-soften the pearls, which doesn't work well with gelato!


I'm still setting up my kitchen and filling it up with goodies, but I don't have a lot of the tools needed to perfect this gelato. A mortar and pestle would have helped grind down those sesame seeds to fine granules, so mine was on the chunky side. And I'm desperate to buy a mixer, so my cream wasn't whipped like this recipe describes. However, my gelato still turned out well. 


So I thought I'd be extra generous and write up 2 recipes, because I know not all of you have ice cream makers. So I've put together a  cheat's guide to this gelato (read below) 

NO ICE CREAM MAKER REQUIRED! 


NO CHURN BLACK SESAME GELATO

Makes about 1 litre


Gelato Ingredients:
  • 2 Tbsp. roasted black sesame seeds and 3 Tbsp of black sesame paste OR 5 Tbsp roasted black sesame seeds and 3 Tbsp honey (to make your own black sesame paste)
  • 1L of plain vanilla ice cream
  • Pinch of salt
Gelato Method:
  • If the black sesame seeds are not roasted, put the sesame in a (non-stick) fry pan over medium heat and stir until they start popping and release a nutty aroma. Remove from the heat and cool.
  • Grind black sesame seeds and salt very finely.
  • Mix in honey if you are making your own black sesame paste. 
  • Stir ingredients into vanilla ice cream thoroughly and serve.


BLACK SESAME GELATO
Recipe based on Just One Cookbook's Black Sesame Ice Cream

Makes about 1 litre


Gelato Ingredients:
  • 2 Tbsp. roasted black sesame seeds
  • 400 ml (roughly 1 2/3 cup) whole milk
  • 70g (2.5oz, roughly 1/3 cup) sugar
  • 3 egg yolks
  • 2 Tbsp. honey
  • 3 Tbsp. black sesame paste (or Homemade Black Sesame Paste)
  • 1 tsp. vanilla
  • 200 ml (Take away 2 Tbsp. of 1 cup) heavy cream
  • Pinch of salt
Gelato Method:
  • If the black sesame seeds are not roasted, put the sesame in a (non-stick) fry pan over medium heat and stir until they start popping and release a nutty aroma. Remove from the heat and cool.
  • Grind black sesame seeds very finely with a mortar and pestle (or the end of a rolling pin).
  • Whisk together the sugar and egg yolk until pale yellow. 
  • Bring milk to a simmer, then remove from heat.
  • Add to the sugar and egg mixture the honey, black sesame seeds, and black sesame paste and whisk until well combined. Then slowly add the milk and vanilla.
  • Pour the mixture into a pot over medium-low heat. Stir until the custard thickens, then remove from heat and cool mixture down.
  • Whisk together the heavy cream and a pinch of salt until peaks form.
  • Add the whipped cream into the cooled sesame mixture.
  • Fold in but be careful not to over mix. 
  • Chill the mixture in the refrigerator for several hours (or overnight) until completely cold.
  • Churn in your ice cream maker according to manufacturer’s instructions.


Sunday, 27 October 2013

CIOCCOLATA SORBETTO - Dark Chocolate Sorbet with Pistachios


Let it be known that this is the best chocolate sorbet recipe ever. It is so damn easy to make and is absolutely delicious! The chocolate flavour is sooooooooo rich and it's a sorbet so it is (practically) dairy-free (depending on what chocolate you use), but somehow it still tastes creamy like a gelato. I love making this sorbet, as it brings a lot of joy to my vegans and lactose-haters! (Shout outs to Akanksha, Jess D & Kaami! xoxo) 


I used a 70% cocoa chocolate, which had a minimal amount of milk solids and the perfect balance of bitter and sweetness. If you're a hard-to-the-inner-most-core dark chocolate person (like this lady), try it out with an 80-85% chocolate and add sugar to taste.

Once I made this sorbet to accompany a friend's birthday cake - a gluten free orange & almond cake, which worked really well together. The cake carried the orange flavour over to the sorbet, creating a delicious Jaffa flavour combination.


And for the second time I made it, I mixed in a small packet of pistachios and sprinkled some on top for a bit of colour.

I tried this recipe twice on a Sorbet setting on my Ice Cream maker - once it turned out perfectly and the second time it was a bit runny. So you might want to check on the sorbet just before it's finished churning and increase the hardness if required.


CIOCCOLATA SORBETTO 
Dark Chocolate Sorbet based on David Leibovitz's Chocolate Sorbet recipe from A Perfect Scoop

Makes about 1 litre


Sorbet Ingredients:
  • 2 1/4 cups (555mL) water
  • 1 cup (200g) sugar
  • 3/4 cup (75g) unsweetened cocoa powder
  • pinch of salt
  • 170g (6 ounces) bittersweet or semisweet chocolate, finely chopped
  • 1/2 tsp vanilla extract

Sorbet Method:
  • Whisk together 1 1/2 cups (375mL) of the water with the sugar, cocoa powder and salt in a large saucepan.
  • Bring to the boil (that's why you need a large saucepan!) and whisk frequently. Once it's boiling, continue to whisk for about a minute.
  • Remove from the stove and stir in the chocolate until it's melted. If it's lumpy, reheat on simmer and stir until smooth.
  • Stir in the vanilla extract and the remaining 3/4 cup (180mL) of water.
  • Transfer the mixture to a blender and blend for 15 seconds.
  • Chill the mixture.
  • Freeze in your ice cream maker on a sorbet setting.
  • Now it's time to clean that mess! :P


Sunday, 20 October 2013

ICE TO MEET YOU


ICE TO MEET YOU (said in an Arnold Schwarzenegger voice, like in the videos below!)

This was the name of the mini gelato festival in Salermo, near the Amalfi Coast in Italy in September. Although I was not physically there, I was there in spirit! My good friends from A Trip for Two sampled a few gelati on my behalf during there travels through Italy - even managing to score 5 free scoops when there was a limit of 1 per person. I take my hat off to you Ben and Michelle!


The best gelato in Italy, according to Michelle, is this chocolate number in the picture below. From a gelateria called Brioscia in Salermo, the gelati are served generously for a cheap price. They even drizzle melted hot chocolate (dark or white) over the top and stick a cone on top! 


As for Ben, the Cremino Pistachio was the best gelato in town (also from Brioscia), which was made of Sicilian pistachios with mixed in pieces of soft but crunchy caramel and chocolate fudge! Bellissimo!! 

Photos of Brioscia, Palermo
This photo of Brioscia is courtesy of TripAdvisor


And now for a whole lotta 'ice' puns!


Wednesday, 9 October 2013

SWEET + SALTY salted caramel gelato with salted caramel praline


Salted caramel seems to be all the trend here in Sydney, with café menus abundant with salted caramel milkshakes, tarts and of course, gelati and ice cream!

I made this salted caramel gelato for some lovely lady friends of mine. I became friends with these girls during our university days, eating Chicken Rolls at Tropical Green (Eat to Enjoy, Drink to Relax!) and surviving many late nights sanding blue foam models for our demanding design course. But since then, our latest common interest is our shared passion for food. We get together regularly to have food adventures across Sydney - we've even labelled it as the 'Get Fat Movement'! 


I finally got around to organising a Hot Pot night and I asked the girls what gelato they'd like me to make. SALTED CARAMEL, the girls replied immediately. I thought it would be easy enough but how wrong I was! This gelato was THE most time-consuming gelato I've ever had to make. I think it took about 2 hours, plus churning time! Usually a gelato will take about 30 to 45 minutes to make. The problematic part is adding the cream to the caramel, which lowers the temperature of the caramel and therefore hardens it. So you have to continuously stir over a low heat to re-melt the caramel-cream mixture to make it runny without burning it!


One thing I didn't perfect was the salted caramel toffee. I made 2 batches, because I got a bit greedy and wanted lots of toffee. I used rock salt and the first batch I used was too coarse and didn't completely dissolve. This left the toffee a bit uneven and too salty in some bits of toffee. I learnt my lesson in time for the second batch and put the rock salt in the blender so that there were finer grains. It worked a treat and the toffee had an even and slightly-salty flavour.

Despite the time and effort that this gelato took to make, it tasted fantastic and the girls loved it, so it was well worth it!


SWEET + SALTY
Salted Caramel Gelato with Salted Caramel Praline based on David Leibovitz's Salted Butter Caramel Ice Cream recipe

Makes about 1 litre

Ice Cream Ingredients:

For the salted caramel praline (mix-in)
  • ½ cup (100 gr) sugar
  • ¾ teaspoon sea salt
For the salted caramel gelato
  • 2 cups (500 ml) whole milk, divided
  • 1½ cups (300 gr) sugar
  • 4 tablespoons (60 gr) salted butter
  • scant ½ teaspoon sea salt
  • 1 cups (250 ml) heavy cream
  • 5 large egg yolks
  • ¾ teaspoon vanilla extract

Caramel Praline Method:
  • Spread the sugar (100g) evenly within a medium-sized saucepan and prepare a large sheet of baking paper for the praline to set.
  • Heat sugar on medium setting until the edges begin to melt, then start stirring the melted sugar until all (or most of) the sugar is dissolved. Stir infrequently whilst cooking (it shouldn't take too long) until you start to see smoke and it smells like it's about to be burnt.
  • Sprinkle the salt and then immediately pour the caramel onto the prepared baking paper sheet.
  • Quickly put down your saucepan and start moving around your baking sheet, holding it by the edges (because it'll be super hot) and tilting it around so that it forms a thin layer.
  • Leave it to set and harden and try not to eat it all. It's hard but it'll taste amazing in the gelato, trust me!

Salted Caramel Gelato Method:
  • Caramelise the sugar (300g), like in the second step in the Caramel Praline Method.
  • Remove from heat, then stir in the butter and salt. Once the butter is melted, gradually whisk in the cream and half of the milk (1 cup) over low heat.
  • As the temperature has dropped, the mixture will harden, so continue to stir and re-melt the hard caramel.
  • In a small separate bowl, whisk the egg yolks and gradually add it to the caramel mixture whilst stirring continuously until the mixture thickens.
  • Pour the custard/caramel mixture through a strainer into a bowl of the remaining milk (1 cup) and stir through vanilla. 
  • Refrigerate mixture until well chilled, then pour into ice cream bowl, then into your ice cream maker and set to desired setting to churn.
  • During the churning stage, break up the praline into little pieces, using a rolling pin or mortar and pestle and stir through about 1 minute before the gelato is finished churning.

Sunday, 22 September 2013

THE BINGE CONTINUES Part 2 - Firenze Gelato Festival


The gelati binge continues! As you may have read in this earlier post, I indulged myself in the creations of the world's best gelati makers at the Gelato Festival in Florence, Italy.

The gorgeous orange colour of the Alkermes gelato by Aurelio Saffi from the Istituto Alberghiero Saffi is what attracted me to this stall, like a starved seagull to a potato chip. The gelato is based on an old Florentine recipe that is said to be originally prepared by the nuns of Santa Maria dei Servi, as early as the thirteenth century. The gelato contains a sweet, red-coloured liqueur which is infused with sugar, cinnamon, cloves, nutmeg and vanilla and more! I was rather surprised to later read that its bright red colour comes from Kermes - a small parasitic insect! Here's another fun fact for you, crimson red dye comes from the female Kermes Vermilio insect species, I guess that's why we call it Vermillion Red. Urgh, it's no wonder I felt so ill afterwards!


Captured by the spirit of the festival and desperate for a break from all the gelato tastings, we went to a book presentation by Gianfranco Vissani, an Italian celebrity chef, who gave a very passionate talk in Italian (without any English translation) about food (I assume!) with lots of hand gestures! We were sitting in the second row in a small crowd so we thought it too rude to leave. The talk went on for what seemed like the longest time and the chef even directed a question to my poor sister, who just nodded along without any clue what he was talking about! Luckily it seemed to be a rhetorical question so she got away with it!

One of Vissani's beautiful gelato creations, although he did all of the talking! Image courtesy of Firenze Gelato Festival.

The chef Gianfranco Vissani giving a very passionate talk! Can you spot The Gelatosmith? Image courtesy of Firenze Gelato Festival.

The prettiest gelato award definitely went to the Lampone Divino gelato by Valerio Esposito from the Gelateria Tonka in Aprilia (Latina). This was a delicious raspberry gelato blended with a rosé wine from a cellar in the Castelli Romani region. This had a far more subtle alcoholic flavour, unlike the Alkermes bug gelato! And like all of the fruity gelati I tried in Italy, this one did not disappoint - it was super creamy!


The Armonia di mascarpone e panettone Milano loison was a like an Italian Christmas party in my mouth! This flavour, by Andrea Portolani from Le Botteghe di Leonardo, was a mascarpone based gelato with bits of panettone mixed in. If you haven't heard of Panettone before, firstly - shame on you! Secondly, it's a delicious sweet bread loaf that originates from Milan that's eaten during Christmas and New Year period. This Panettone is made by a confectioner in Vicenza, Loison. I like to use Panettone for trifles, it's divine!


The last flavour we tried was the Acquolina, named after the Florence-based Gelateria from Paolo Lombardi. This gorgeous looking gelato was a smooth mascarpone cream was studded with mini caramelised choux buns filled with hazelnut and cocoa cream and coated with chocolate. If I hadn't felt like I was a gelati-filled balloon about to explode, this one probably would have been my favourite. I'm such a sucker for a good mix-in!


Check out those chocolate covered choux buns! Image courtesy of the Gelateria Acquolina facebook page.

And this is the reason why I started running when I got back from my trip!


At the start of the festival, I was a bit like the guy in the video, on the right. Mwah!! Bravo!!


And this was me at the end of the festival - gelato hangover!

Tuesday, 17 September 2013

THE BINGE Part 1 - Firenze Gelato Festival


Image courtesy of Firenze Gelato Festival 
You may remember this earlier post, when I was in Florence for the Gelato Festival - a celebration of all things gelato, in the city where the gelato originated. It was our last day in Florence and the first day of the Gelato Festival. My sister and I ambitiously bought a Gelato Card each, which included 5 free tastings plus a gelato cocktail. The festival had stalls set up for the maestros - some of the best gelato makers from all over the globe - each showcasing one special flavour to win the best Gelato of the festival. I was as determined as a Pokemon master, gotta catch 'em all

However, I didn't get off to a very good start. I began the day with a very large Gelato cocktail - a delicious Mojito (pictured below). I couldn't even finish it, knowing that I only had a few hours to get through 5 cups of gelato.


Our first gelato tastings were from the festival's main sponsor, Sammontana. I tried the Pistachio and my sister had the Strawberry. They were both pretty average and forgettable, in comparison with the rest of the gelati we tried.

The Sammontana gelato stand. Image courtesy of Firenze Gelato Festival.


Now for the Maestri Gelatieri (the Master Gelato Makers)!

The first and in my opinion, the best flavour of the festival was the Crema di miele con zenzero e timo limone - a ginger and honey gelato with lemon thyme by Cláudio D. Guerreiro (pictured below). The gelato was amazingly smooth and creamy, the ginger, honey and lemon thyme flavours were subtle but complimented each other perfectly. Who knew, the Portuguese are connoisseurs of gelato?! If I ever am lucky enough to go to Portugal, I'll be heading to Delizia in Tavira!


Another delicious flavour was the Cioccolato salto con scorze di arancia candida, or the chocolate gelato enriched with candied orange peel and salt crystals by Gianfrancesco Cutelli from the De' Coltelli gelateria in Pisa (picture below-left). This familiar flavour combination - orange and chocolate, but the added bursts of salt made this gelato a winner. The chocolate also came from Pisa, from the Dutch chocolatier Paul de Bondt.
Cristina Berto produced the Gelato al riso nero lomellino, a gelato with Venere black rice (picture below-right). This flavour was quite subtle and had an interesting colour and texture, but overall it didn't impress me as much as the others, so I dub this one The Shania (Btw I am feeling the urge to buy a head-to-toe leopard print outfit to wear in the desert).


Pine nuts seemed to be the big trend of the festival, with 3 maestros showcasing various pine nut flavours. The one we tried was the Pinolo flavour by Antonio Mezzalira from Golosi di Natura, which was prepared with pine nut paste, topped with toasted pine nuts and a ripple of caramel. This was the first pine-nut flavour I tried and I absolutely loved it! This flavour won first place of the festival and I can see why!


More from the Gelato Festival coming soon!